Breaking Out of the HDR Rut with Lightroom 5: Photomatix Pro vs. HDR Effects Pro vs. Lightroom 5
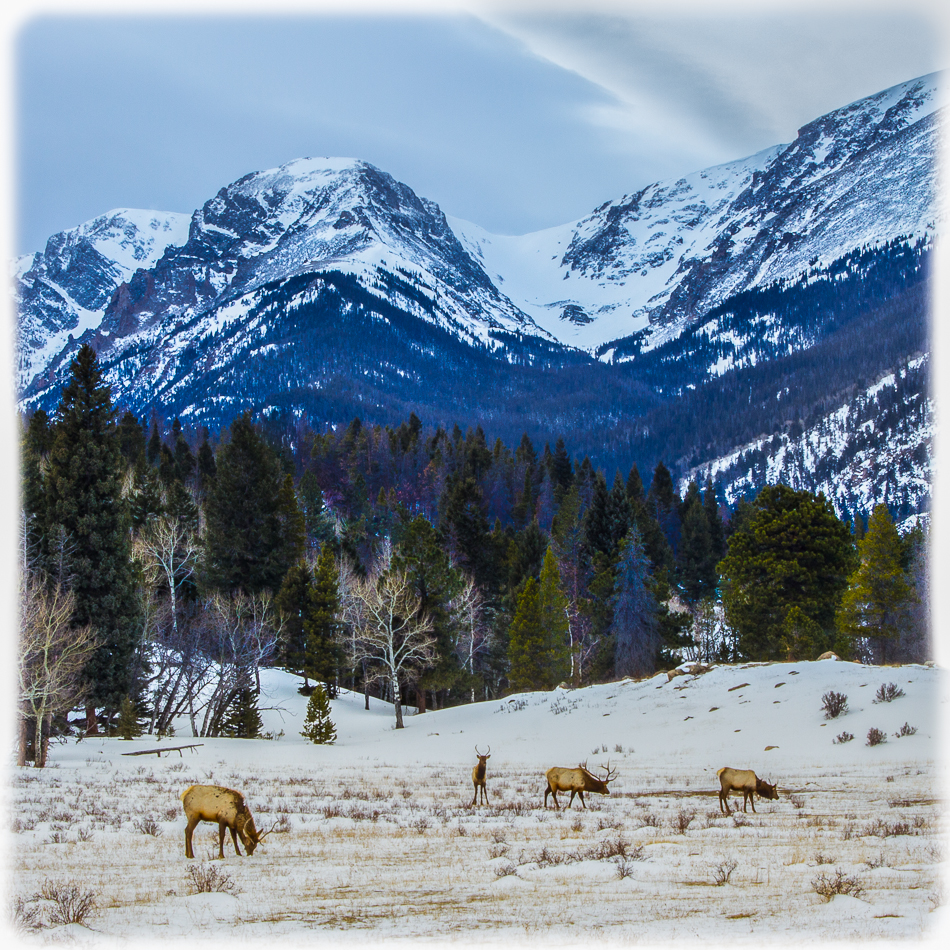
For quite some time, I’ve felt like I’ve fallen into the HDR rut and wanted to challenge myself to break out of the box of my routine HDR workflow. I’m proud that I “busted out” today and created this photograph which was enhanced solely using Adobe Lightroom 5 with no HDR processing whatsoever. In fact, the only adjustment was using highlight recovery:
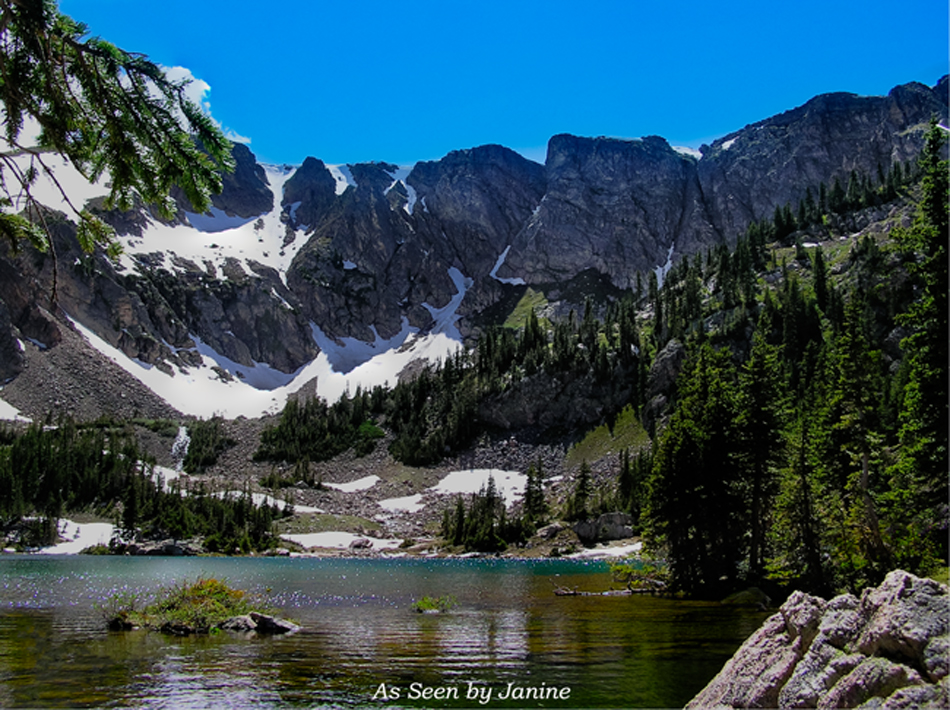
Elk Encounter in Rocky Mountain National Park Highlight Recovery in Lightroom 5 Only
To grow as an artist, it is vital to step outside of your comfort zone and try new things! This has become increasingly important to me as I’ve begun having many opportunities to sell fine art landscape photographs, but have discovered that not everyone loves HDR effects as much as I do. I’ve come to understand that finding a way to post-process images in a more “purist” way will likely net me more fine art sales.
In my quest to find a new way to get great looking results, with excellent tonal range and fantastic color, I put a new image to the test. I used a photo I recently took of an encounter with some elk in Rocky Mountain National Park and processed the same RAW file with four different post-processing methods:
1 – My many years “tried and true” favorite – Photomatix Pro 4.2
2 – Branching out to “test drive” Nik/Google HDR Effects Pro
3 – Using highlight recovery alone in Lightroom 5
4 – Further enhancing the image in Lightrooom 5
WOW, was I surprised at the results!
To best judge for yourself, I recommend clicking on each image to view the original source, then using your back browser button to continue reading.
To fully appreciate what I discovered, let’s start by looking at the original raw photo, which has had no post processing other than cropping to a square format and adding a white feathered vignette:
Elk Encounter in Rocky Mountain National Park Original RAW
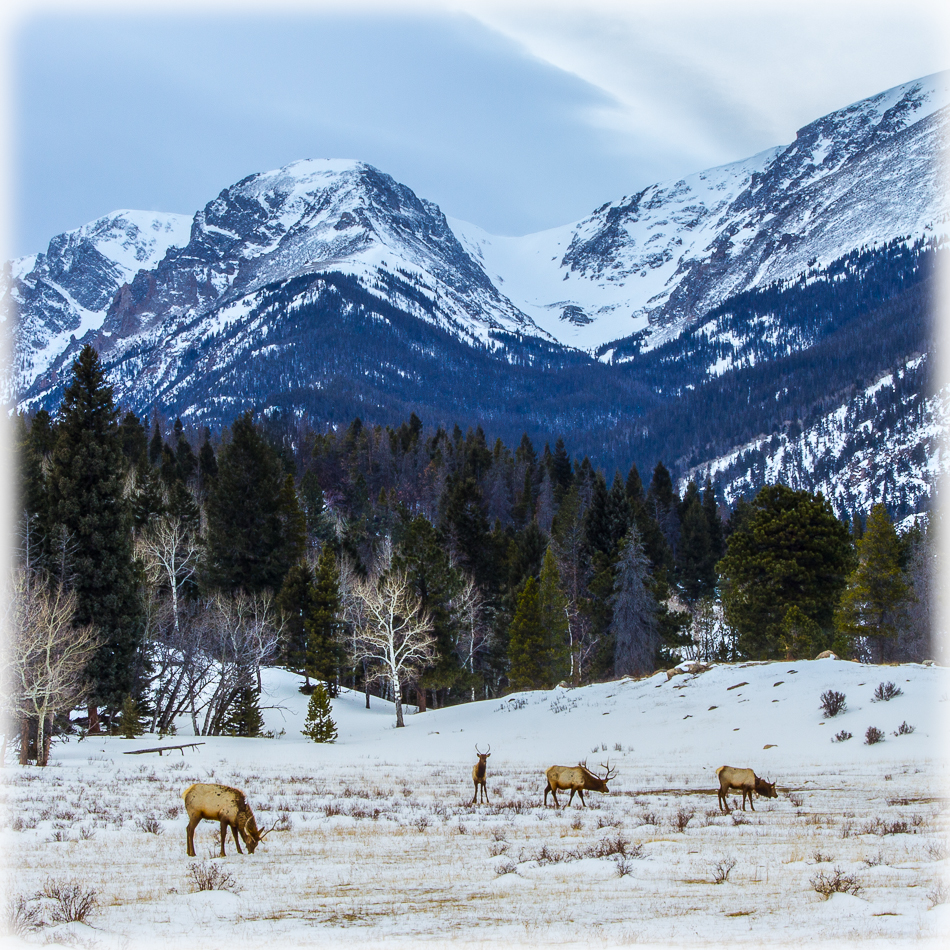
This is the kind of lacking-in-punch photo which has always led me to believe HDR is the only solution to turn “boring” into “brilliant” results. The extreme washed out highlights, in particular, would have normally made me conclude HDR is the only solution. To see if this was the case, I began with simply doing highlight recovery alone and nothing else within Lightroom 5. I was so surprised how much I liked the result that this image may well be my favorite:
Elk Encounter in Rocky Mountain National Park Highlight Recovery Only in Lightroom 5
Not yet willing to concede that HDR processing wouldn’t yield me a better result, I processed the same RAW file with two different HDR plugins: my longtime favorite, Photomatix Pro, and Nik/Google’s HDR Effects Pro, which I’ve owned for years but never used. The test was carried out creating a single exposure HDR with each plugin.
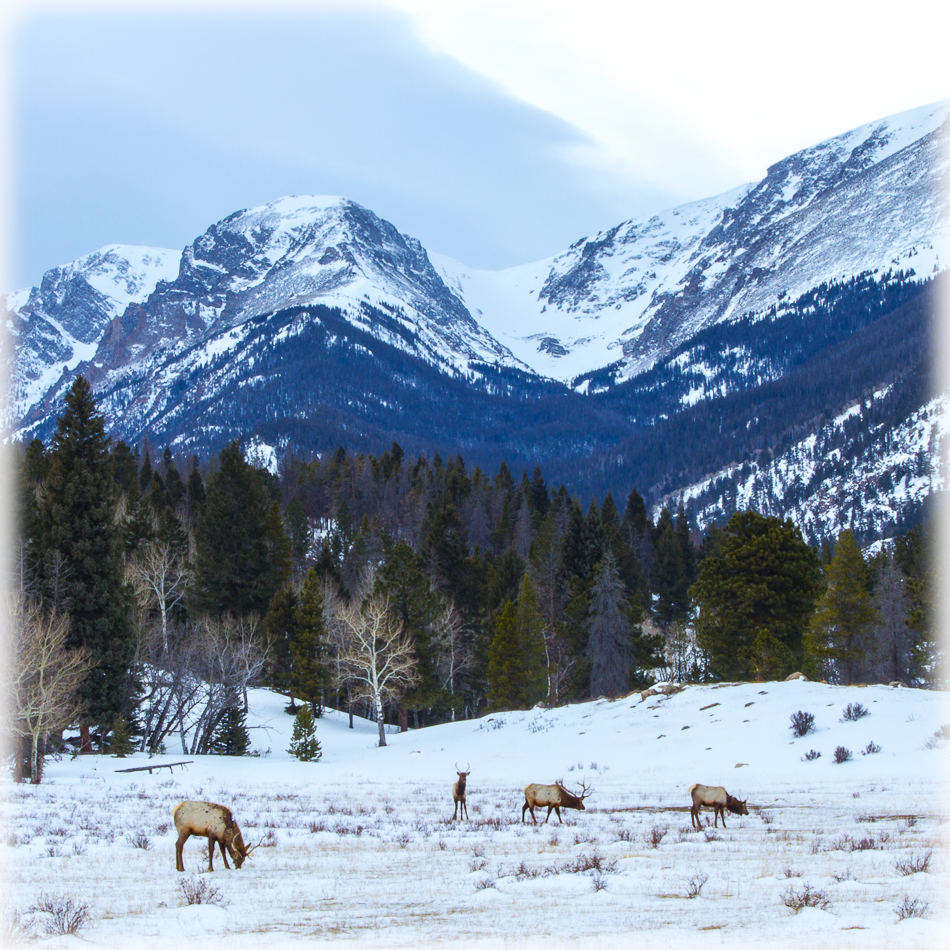
Surprise again! I greatly preferred the result I got using HDR Pro over my usual Photomatix Pro. Here are the two HDR photos to show you why:
Elk Encounter in Rocky Mountain National Park Nik / Google HDR Effects Pro
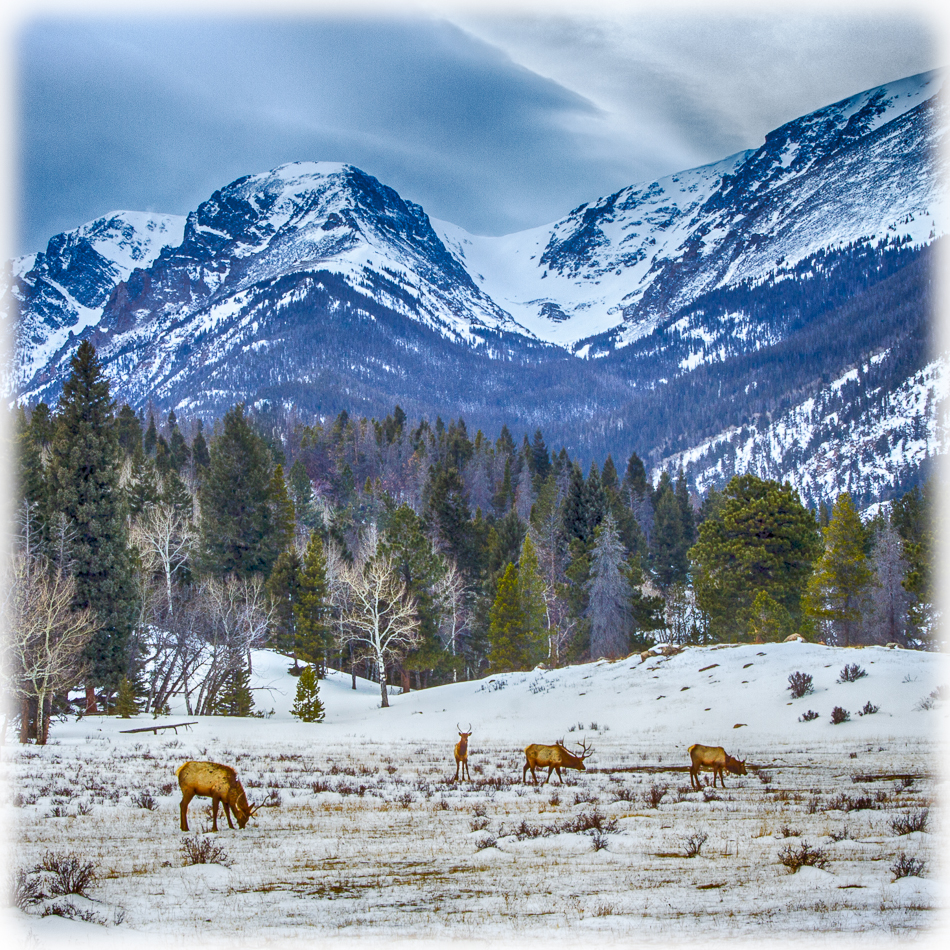
I first created the HDR Effects Pro single exposure HDR, shown above, and was very pleased with the results. In fact, I was surprised at how much I love it, especially given that it was created with only one image, rather than with three merged tone-mapped exposures. Below is the Photomatix Pro 4.2 version, which I created using similar settings to those I’d used with HDR Effects Pro:
Elk Encounter in Rocky Mountain National Park Photomatix Pro 4.2
Much to my shock, I was not able to get an effect I liked much using any setting combinations with my old best friend, Photomatix Pro. In particular, I could not get a single exposure HDR which didn’t look noisy to me, no matter what I did. I also couldn’t get color balance I was happy with using the Photomatix Pro plugin alone. By contrast, I discovered the HDR Effects Pro plugin has better overall color controls. In general, I preferred the HDR Effects Pro version of this photograph.
The verdict was that my longtime best friend, Photomatix Pro, is no longer my only bestie. I’m not saying I’ll never use it anymore, given that I have a ton of HDR photos I adore which were created using Photomatix. To see examples of some of my favorite HDR photos which were all created with Photomatix Pro, check out one of my most popular posts:
HDR Photos: Capturing the Elusive Sweet Dulcinea
All those photos are images in which I truly love the effects I got with Photomatix Pro 4.2 and I’m sure I’ll still use it for many photos. Nonetheless, between the two single exposure HDRs of this particular photo, I preferred the Nik/Google HDR Effects Pro version.
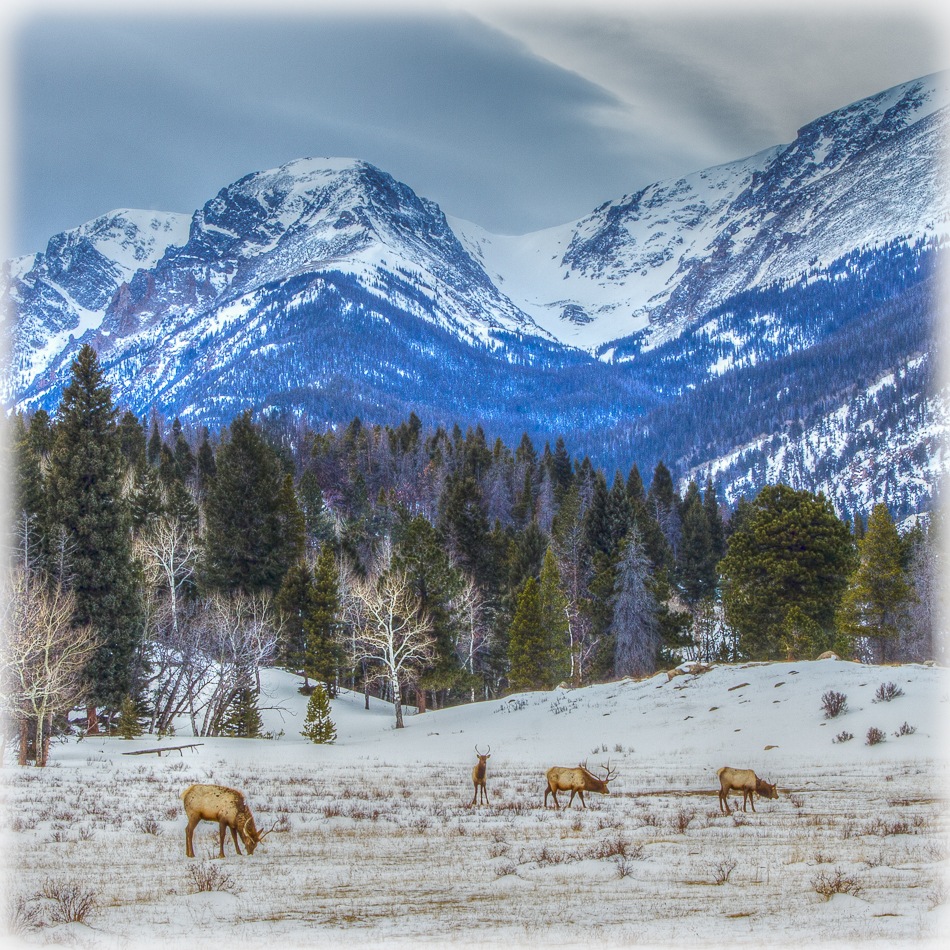
I almost came to the conclusion that the Nik/Google HDR Effects Pro was my favorite of all, but then I remembered that my original intent was to break out of the HDR rut. All the same, many clients do like a bit more “punch” than I obtained with only highlight recovery, so I created an image which was processed in Lightroom 5 alone but with some more enhancements, such as increased clarity, vibrance, saturation, and contrast:
Elk Encounter in Rocky Mountain National Park Enhanced in Lightroom 5 Alone
I really love this image and was astonished that I obtained it without any HDR processing. I think it is likely my favorite of all the results I obtained. Boy will this be a time saver now that I realize I can obtain these kind of enhanced results strictly within Lightroom! To see how it compares to my favorite of the HDRs, here is the Nik / Google HDR Effects version:
Elk Encounter in Rocky Mountain National Park Nik / Googl HDR Effects Pro
Of the two, I prefer the Lightroom enhanced version better because it is more realistic. For clients who like a slightly enhanced image style, I would likely offer both of these options for them to choose between.
The reality is, though, that many clients, much like many professional photographers, are really “purists” which is what led me to embark on this experiment in the first place. Many just might prefer the image which has no enhancements, save for highlight recovery alone in Lightroom 5:
Elk Encounter in Rocky Mountain National Park Highlight Recovery Only in Lightroom 5
I’m honestly shocked how much I leaned towards this being my favorite of all the versions, though in my heart, I like the one with the additional Lightroom enhancements best of all. Still, I have to admit that this one is the most true-to-life rendition of the original wilderness landscape scene. In the future, I’ll be sure to offer this sort of simple option to potential fine art clients.
To help me get a “litmus test” I’m really eager to hear what you think of the four results I got. Please comment to let me know which final photo you prefer and why. I’m also eager for feedback on how I could get better results with any or all of the four processes I used. So by all means, comment, and please share this post!
Janine Fugere – As Seen by Janine: Eyes of the World Images


Pingback: Subscribe to Comments Reloaded Plugin Reviewed | As Seen by Janine's Photo Blog by Janine Fugere